While setting up a half rack Exadata system, we discovered a problem with the motherboard in database server 4, so we got ourselves a new one. Even for an internal system, I had to log an SR, get our hardware team to review the diagnostics and have them confirm that a new motherboard is required. I had a full customer experience with me being both the customer and Support Engineer! Anyway, a replacement motherboard arrived the next day.

We stopped the clusterware on that database server and powered it down. It was time to take the new motherboard to that noisy computer room.
We disconnected both power cords from the server, but we left all other cables plugged in. We then (slowly, very slowly) pulled the server out of the rack (it's on rails, so it just slides out). In a field engineer lingo, we 'extended the server to the maintenance position'. All cables were still plugged in, but the cable management arm took good care of them. From the photo bellow, it can be seen that this was a half rack system, with all other database servers and storage cells up and running.

Once the server was fully extended, we removed the top cover and disconnected the cables (Ethernet, InfiniBand and KVM). We then removed the PCIe cards (RAID controller, dual port 10Gb Ethernet and dual port InfiniBand HCA). On the photo bellow, the PCIe cards and memory modules were already removed so the motherboard is fully exposed.

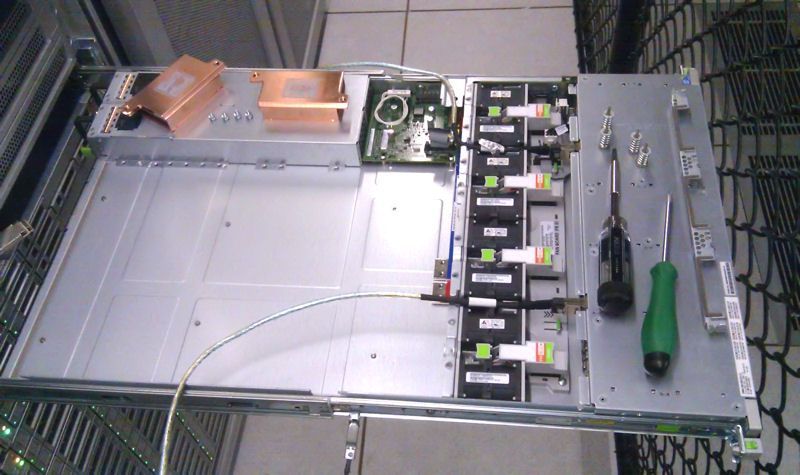
Motherboard was then taken out of the chassis. On the photo below we see the dual power supply (top left), two CPU heat sinks (removed from the CPUs and resting on top of the power supply), row of fans (middle) and disk drives (right). Well, we cannot see the disk drives as they are covered, but they are there under those tools.
It was then time to transfer the CPUs and memory modules from the old motherboard to the new one.

The memory modules are easy to put in as they just click in. The CPUs are tricky with all their pins, so they need to be put in very carefully.

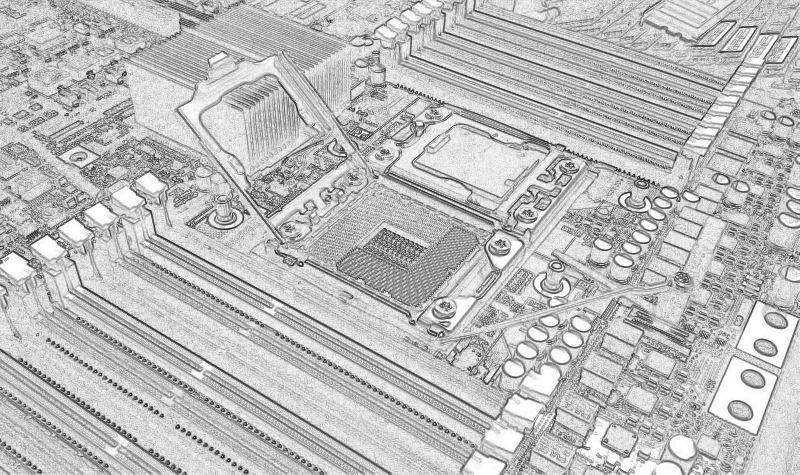
After that the new motherboard was ready to go into the server. On the photo bellow we can see two CPUs, without the heat sinks, and two rows of memory modules. This server had 'only' 96MB of RAM, with plastic fillers in 6 slots. There is room for the total of 144GB of RAM on that motherboard.

The motherboard is shipped with the thermal paste, so now was the time to apply that paste on top of the CPUs, and put the heat sinks on top of them.

The photo bellow shows that all parts were back on the motherboard. Note that three PCIe cards are not plugged into the motherboard directly. They are plugged into the little raiser boards and those are plugged into the motherboard.

Plug back in all the cables (Ethernet, InfiniBand and KVM), put the cover on and slide the server back into the rack. Connect the power cables and turn the server on.
Our server came up fine and the only thing we had to do was set up ILOM. That is done by running /opt/oracle.cellos/ipconf.pl and specifying the ILOM name, IP address and other network details. We also had to reset the ILOM password.
Finally, we started up the clusterware and all services came up fine. All this was done with only a single database server out of action (for about an hour and a half) with the clusterware and database(s) running on the remaining three nodes in the cluster.